Category Archives: Beauty

Does It Hurt to Do Your Hair?

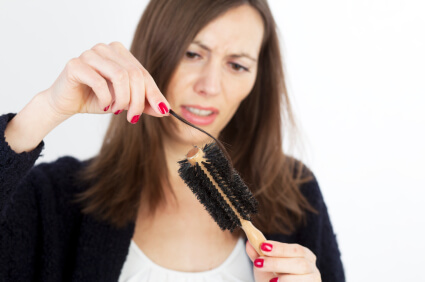
Shocked woman losing hair Adrienne Dellwo, at About.com’s fibro and chronic fatigue site, recently wrote about her frustrations with her hair:

The picture of me on this page (which is badly in need of updating) shows what I call my “too sick to do my hair” hairstyle. As my functionality improved, I changed it to something that takes a little work, but not much. And still, I have a wide selection of hats for days when I’m just not up to styling it. I have a huge problem in the summer, because my forehead sweats excessively when I’m warm (another fibromyalgia symptom) and undoes my do in a hurry.

Do I ever know the feeling . . . and that’s to say nothing of the excess hair loss we fibromyalgia folks sometimes experience.

I’ve been there, done that, gotten the frizzy and thinning mess of tresses to prove it.

Fortunately, there are some alternatives for those bad pain/bad hair days.

Stop Fighting Mother Nature

One of the worst offenders when it comes to hair-related pain is the insistence on fighting our natural textures. Wavy- and curly-haired girls want to go straight. Straight-locked women want waves or curls. And nobody likes frizz.

Talk to your stylist about good haircuts and styles that work with your natural texture and face shape, instead of requiring multiple “products” and sizzling straightening or curling irons.

It might take some time to grow out into a longer length, or a commitment to go much shorter. Be open to the possibilities. After all, it’s just hair — it will grow back.

Treat Your Hair and Scalp Gently

Another pain-inducer is rough treatment: brushing, combing, yanking back into too-tight ponytails.

Ease up on the heavy brushing. Nobody needs the old “100 strokes every day” treatment, certainly not us. Comb your hair only when it’s really wet. And if a ponytail is the best way to get your hair looking presentable without overstressing it or you, then choose the snagless elastic holders over the tangle-creating ones.

Choose Face-Framing Styles

The things we rely on to keep our hair out of our faces — barrettes, clips, hairbands, etc. — can also increase pain, even when they’re used correctly. By all means keep a few on hand for days when scalp pain isn’t a problem, but if you are experiencing tender-scalp moments, invest in a good face-framing cut that won’t require such accessories to look good.

One Word: Scarves

A vast improvement over those headache-causing headbands, a pretty scarf does double-duty. It looks very elegant and does not trigger tender scalp pain. You can use them in any number of ways as hair accessories. Get some ideas right here.

Let Hair Dry Naturally

If you know you’re going to need to put in the time and effort with a heated styling tool, such as a straightening iron or curlers, give your hair and yourself a break by letting your hair dry naturally first.

Simply squeeze out (never rub vigorously!) the water from your hair post-shower with an absorbent towel, gently comb out tangles (use a detangling or leave-in spray conditioner to help with this), create the part, squeeze water out one more time, and go about other tasks or rest until your hair is dry.

When you’re ready, go about styling as usual.

Note: This will probably mean showering earlier than you otherwise would, of course, if you’re getting ready for a particular event.

Invest In a Second Set of Arms

Something I’ve long wanted to try is this hair dryer holder (Amazon non-aff link). Placed on a counter-top, it holds the hair dryer in place, leaving your arms free to style, instead of hold the (increasingly heavy) dryer.

If anyone’s given this a try, please share your experience in the comments!

Shine On

What’s your favorite hair-care tip? Share your tips and tricks below in the comments!
The Doll’s Three-Step Guide to Looking Great After a Sleepless Night

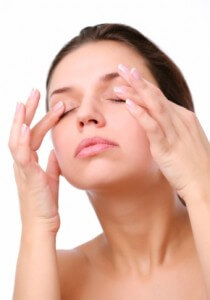
Picture of Woman Massaging Tired Eyes

Pain keeping you awake at night? It’s one of the chief complaints of the chronically pained. I can’t tell you how many nights I tossed and turned, or whimpered and stayed really, really still hoping to find some relief, only to crawl to the mirror the next morning and see the consequences of pain-triggered insomnia all over my almost-unrecognizable face.

Puffy eyes? Check. Sallow skin tone? Check. Permacrease in between the brows, dark circles under the eyes, and a general sense that I’d aged about 20 years overnight? Check, check, and, oh yes, check.

If pain is causing you a run of sleepless nights, the most important thing you can do for yourself and your health is to tackle that problem head on; for some specific strategies on how to get more sleep on a regular basis, check out our article on improving sleep hygiene.

And to get the most out of the day that follows, read on to learn the three easy steps to mask the tell-tale signs of insomnia, using cosmetics and items most every Doll already has on hand.

Step One: The Power of Cold Water

What you’ll need: glass, water, ice, and half a lemon

Start with some ice-cold water — inside and out. For a quick pick-me-up, and an added boost of Vitamin C to help shore up your immune system (which is impaired by regular lack of sleep), add the juice of half a lemon to a tall glass of cold water and sip as you get ready for the day.

Then tie back your hair and wash your face, finishing with an ice-cold rinse. Cold water will help wake up tired skin, refresh you psychologically, and reduce swelling. Pat on a moisturizer with sunscreen, and get ready for step 2!

Step Two: Brighten Those Doll Eyes

What you’ll need: brightening concealer, mascara, eyebrow brush/powder, eyeliner brush, highlighter

Now that the “canvas” is clean and prepped, move on to combat those dark circles. Not just any concealer will do here: you want a cream-based product that contains a brightening agent. The one I use is Almay Bright Eyes (affiliate link) – it’s a concealer and an eyeshadow base in one, and I love the texture – goes on smoothly over my aging (ahem!) skin.

You’ll want to dab it on gently and cover the entire undereye area, from corner to corner, then blend well. If you’re using the Almay product, also apply to the eyelid itself sparingly.

Next, pay some attention to your eyebrows. A well-arched, well-groomed brow will have the visual effect of lifting your face and negating that “slack” look that tired skin develops. Using an eyebrow brush with a powder that’s within a shade or two of your natural brow color, apply the powder in upward, short strokes, gently emphasizing the natural arch of your brows. (Note: now is not the time to tweeze! That will only add to redness and swelling.)

Add a pale, shimmery highlighter on the brow bone only — use a light touch here, because too much can make you look clownish. Then — and here’s the top-secret secret a lot of Dolls need to know: add a little bit of that same highlighter in the inner corner of your eyes. Just a little bit will brighten the entire eye.

Add eyeliner if you like, but don’t encircle the eye completely. Instead, concentrate the liner on the outer corners of the eyes, and if you’re very skilled with the eyeliner brush, wing it up slightly at the edge.

Add mascara, concentrating on the outer lashes — again, this will create the illusion of a wide-eyed awake look.

Step Three: Add a Little Color

What you’ll need: cream-based blush, light lip gloss in natural shade

Stay away from powder blushes when you’re combating the fatigued look. Cream based blushes work much better and are more blendable. You want to apply it very lightly to the apples of the cheeks, and blend outwards extremely well. There should be no noticeable lines here — just a gentle flush of color. Pinks work well for most skin tones and convey a look of overall health, which will make you look more alert.

Eschew the lipsticks. When you look tired, a light gloss works wonders. Again, use a pink-toned shade that’s right for your coloring — nothing too bright or garish here! Look for a shade that approximates your own lip tone, and apply a light coat.

If you like, you can finish with a very light dusting of powder to set your makeup.

That’s it. Three steps, and you’re out the door, looking much more awake than you feel!